


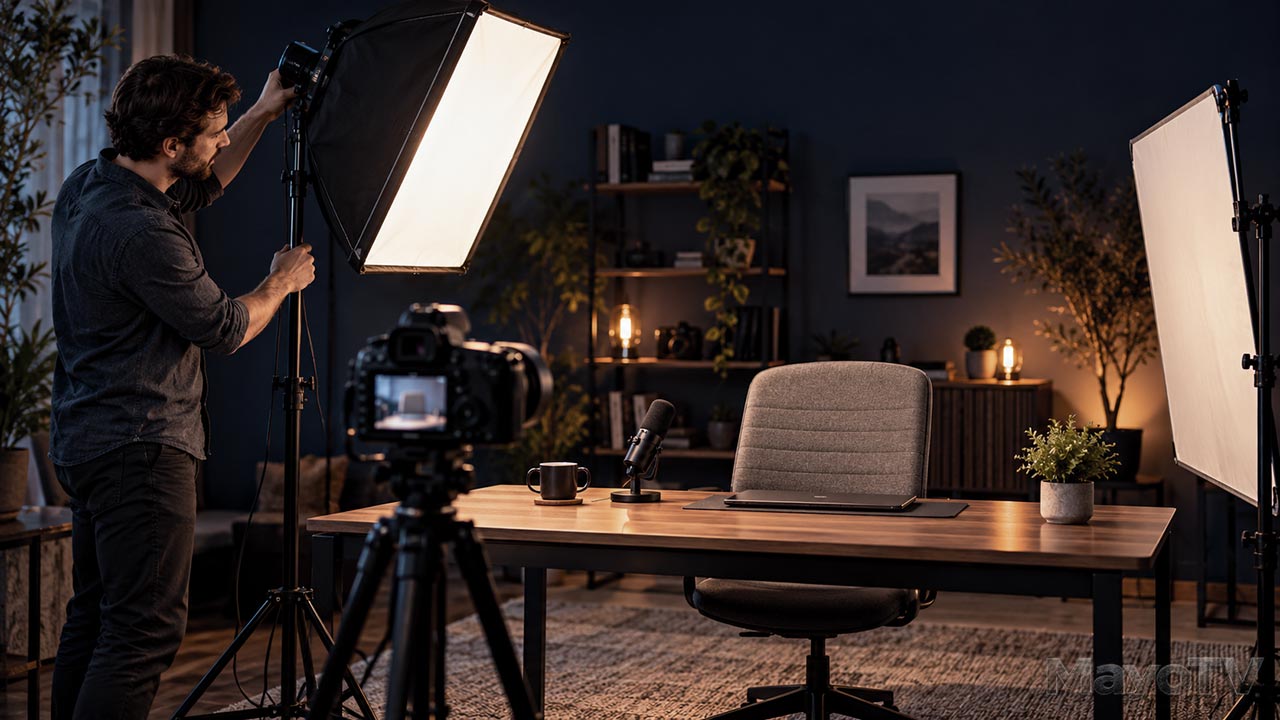
Practical Home-Studio Lighting: Make a Simple Setup Look Better
Your camera is ready, the background is tidy, and the presentation makes sense. But the picture still feels flat, your face has heavy shadows, or a bright window pulls attention away from everything you are saying.
The answer may be the position of the light rather than the price of the equipment. In a modest home studio, one carefully placed light can give you a useful starting point for a presenter video, interview, or demonstration.
Start by deciding what viewers need to see. Then build the lighting around the subject, check the image through the camera, and make small adjustments before adding more equipment.
Start with the Camera Frame
Set the camera and presenter positions first. Look at the complete frame: the face, desk, background, and any object you will demonstrate.
Notice what attracts your eye. Is the brightest area the presenter, a window, or a lamp behind the desk? Can you see the speaker’s eyes? Does the product disappear into shadow?
Turn off unnecessary room lights for an initial test. This makes it easier to see what your main light contributes. You can bring other lights back when they serve a purpose.
Use the camera view to judge each change. A room that looks comfortable in person may record very differently.
Position One Main Light
Your main light is often called the key light. It establishes the subject’s basic illumination and the direction of the shadows.
As a starting arrangement, place it slightly to one side of the camera and a little above the presenter’s eye level, angled toward the face. This can create some shape without leaving half the face unreadable.
Move the light farther to the side if you want stronger shadow, or nearer the camera’s direction for a more even result. Adjust its height if the eye sockets become too dark or the nose shadow looks distracting.
For a demonstration, check the hands and object as well as the face. Rehearse the action so you can see whether the presenter blocks the light while working.
Make the Light Softer
Soft lighting produces more gradual transitions between lit and shaded areas. The apparent size of the light source matters: a larger source relative to the subject generally creates softer shadows.
A suitable softbox enlarges the emitting area of a small light. Moving that softened source closer can also make it appear larger to the subject, though you may need to reduce its brightness.
Diffusion alone does not guarantee soft light if the effective source remains small or distant. Compare the edge of the shadows rather than judging softness by how bright the image looks.
Aputure describes softboxes as modifiers that turn small point-source fixtures into larger lighting sources. Use modifiers intended for your equipment, following its mounting and clearance instructions.
Manage Window Light and Color
A window can provide useful light, but its brightness and direction can change during a recording session. Direct sunlight may also create harder shadows than you want.
Decide whether daylight is your main source or something you need to control. Adjust the recording position, use existing blinds, or choose a more consistent time to film. Check again between takes if conditions change.
Different light sources can give the face different color casts. White balance tells the camera how to interpret the lighting color. Canon’s guidance explains that custom white balance can be set for a particular light source.
Where your camera allows it, use a consistent white-balance setting for a stable setup. If the lighting changes substantially, reset and test it. One setting cannot always correct several conflicting colors falling across the same face.
Fix Glare and Deep Shadows
If glasses reflect the light, change the light’s position or height and watch the result through the camera. Check that the adjustment still lights the eyes and works when the presenter moves.
For a reflective demonstration object, try changing the angle between the light, object, and camera. More brightness may simply make the reflection stronger.
If the shaded side of the face is too dark, a white reflector or board can bounce some light back. This is called fill. Add only enough to make important details visible while keeping the shape you want.
Leave some distance between the presenter and background when the space permits. It can help keep cast shadows away from the backdrop and make the framing easier to control.
Record a Before-and-After Test
Record a short sample with your starting setup. Then change one thing: the main light’s position, its distance, or the fill.
Keep framing and camera exposure consistent where possible. If automatic exposure changes, account for that when comparing the clips.
Look for readable eyes, natural-looking skin, useful shadow detail, and fewer distracting reflections. Keep the improvement that serves the presentation, then photograph the setup so you can repeat it.
Your Lighting Checklist
Before filming, confirm:
- The face and demonstration area are clearly visible.
- Shadows support the subject without hiding essential details.
- Glasses and reflective objects have been checked for glare.
- Daylight and white balance are reasonably consistent.
- Stands are stable and cables are out of the movement path.
- A test recording has been reviewed.
For the complete planning-to-delivery workflow, explore Video Production: From Idea to Screen. A useful lighting setup is one you can understand, repeat, and adjust to the work in front of the camera.










Leave A Comment